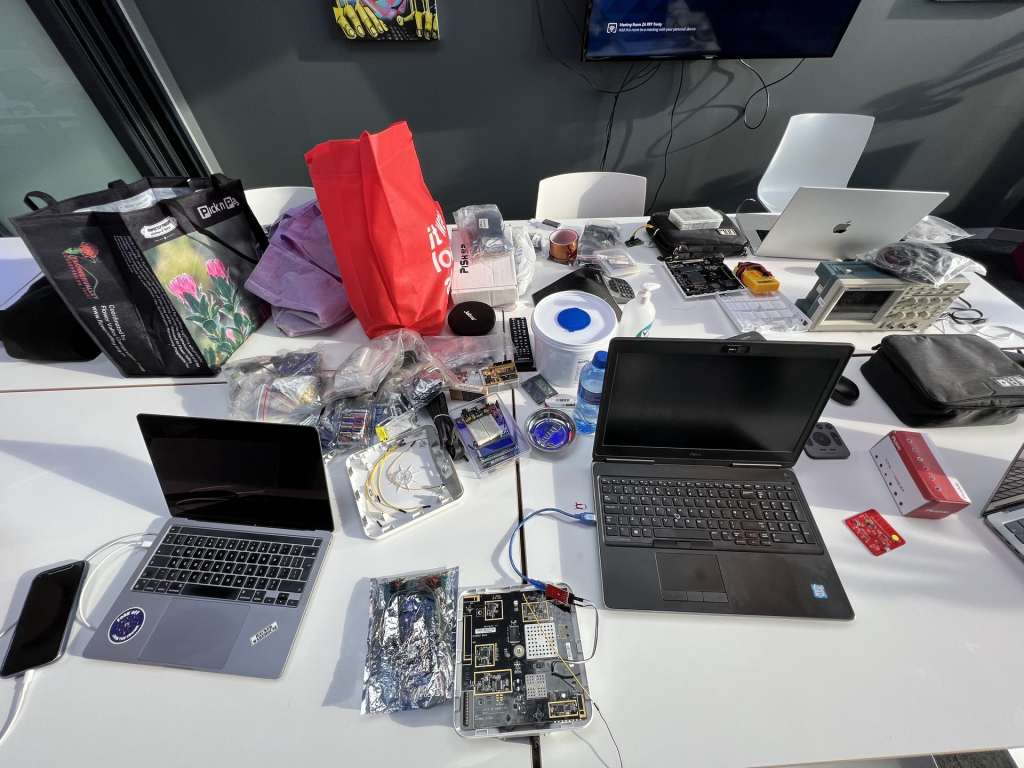
Michael Rodger, Daniel Scragg, Isak van der Walt, Thulani Mabuza and Rogan Dawes formed the Chubby Hackers team to investigate the Wink Hub 2 during SenseCon 2023. This was building on our project from SenseCon 2022 where we looked at the Wink Hub 1, particularly the various debug interfaces for the main i.MX28 and the peripheral radio controller chips. There is quite a lot of detailed information available online for the Wink Hub 1, but not a whole lot for the Wink Hub 2. In fact, there is practically nothing! We aimed to change that.
Future unqualified references to “the Hub” will mean the Wink Hub 2, just for convenience.
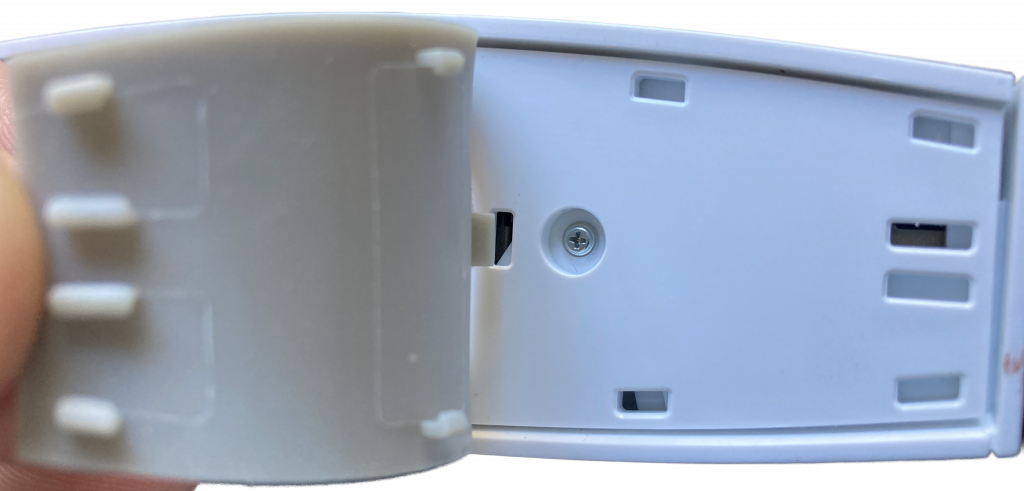
Opening the Hub is a relatively simple matter. The rubber pad underneath can be pulled off, as it is just press fit into some recesses.

Under the pad are two small screws holding the bottom part of the case to the rest of the case.

Pull the bottom off (watch out for the weight!), and then you can slide the two halves of the case in opposite directions to separate them. No spudgers are required!

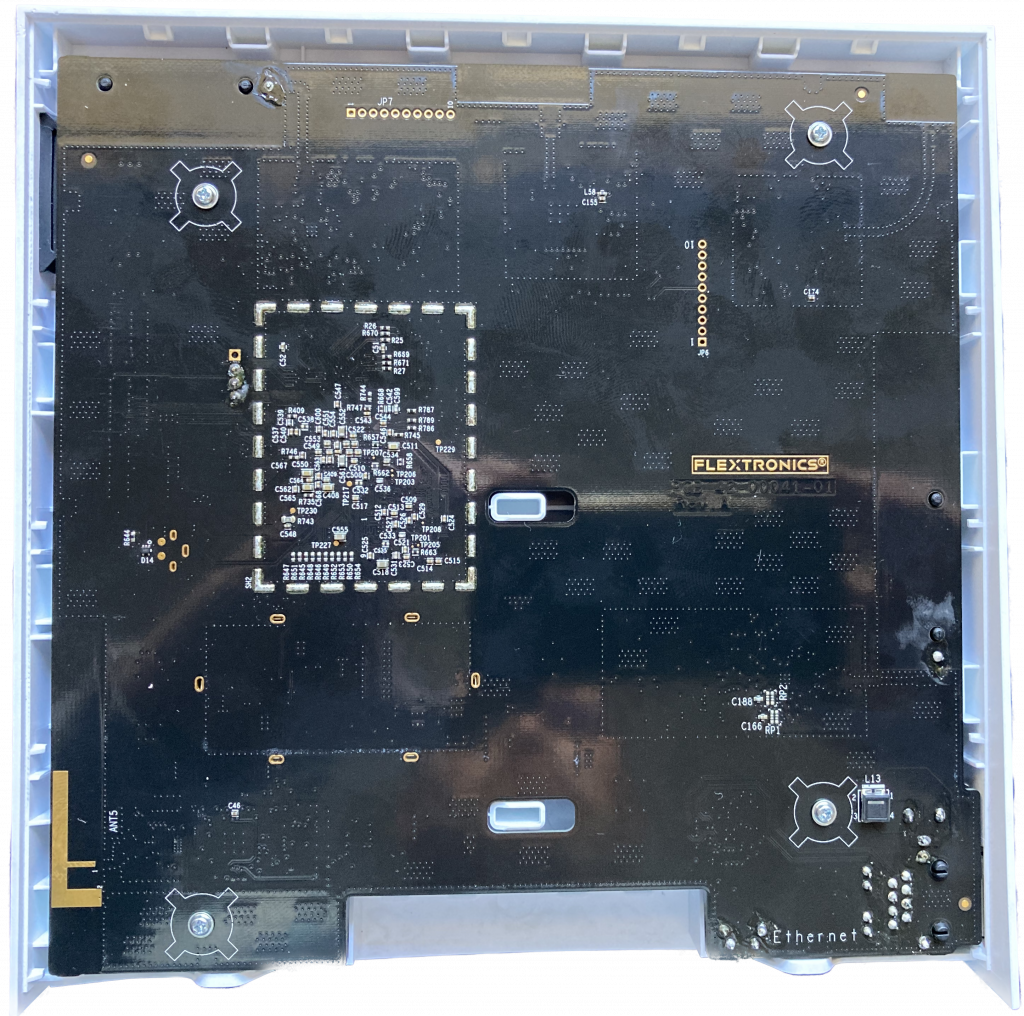
You can then unscrew four screws holding the PCB onto one half of the case, and access the component side of the board.


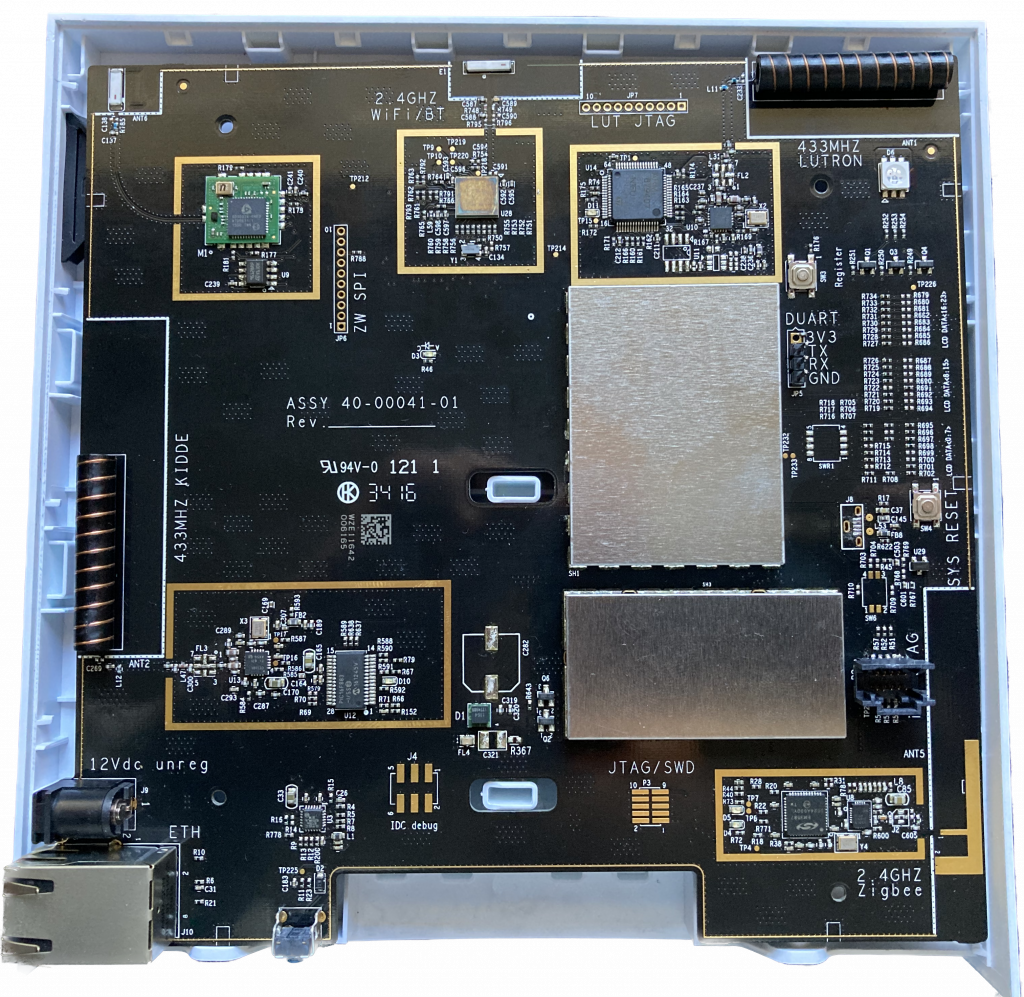
The Hub 2 looks quite similar to the Hub 1, with the various radio blocks arranged around the periphery of the PCB, and the debug or programming interfaces available as either through-hole pins or SMD pads. There is also the through hole UART for the i.MX6 main CPU and pads for the JTAG interface.
We then soldered header pins for the i.MX6 UART, attached a USB-UART cable at 115200, and powered it on. The boot log can be found here.
A couple of things are worth noting immediately. Firstly, U-Boot does not allow you to interrupt the boot process, it proceeds immediately to run the boot scripts.
Hit any key to stop autoboot: 0 Secondly, when it loads the next stage, you can see that Secure Boot and High Assurance Boot are enabled:
Loading from nand0, offset 0x3700000
   Image Name:   Linux-3.14.52
   Image Type:   ARM Linux Kernel Image (uncompressed)
   Data Size:    49798474 Bytes = 47.5 MiB
   Load Address: 80800000
   Entry Point:  80800000
Secure boot on, reading 49807392 bytes to get SRK data

Authenticate image from DDR location 0x80800000...

Secure boot enabled

HAB Configuration: 0xcc, HAB State: 0x99
No HAB Events Found!
It takes quite a long time to read the 47.5MB and verify it. That corresponds to the full “app” partition, which includes the kernel.
5 cmdlinepart partitions found on MTD device gpmi-nand
Creating 5 MTD partitions on "gpmi-nand":
0x000000000000-0x000000300000 : "boot"
0x000000300000-0x000002300000 : "updater"
0x000002300000-0x000002d00000 : "database"
0x000002d00000-0x000003700000 : "dbBackup"
0x000003700000-0x000008000000 : "app"
At this point, it’s worth understanding exactly what we are dealing with. I found a document from NXP describing High Assurance Boot. There is also a nice overview by a board manufacturer. In essence, an asymmetric key pair is generated, which will be used to sign any code images to be executed. The hash of the public key is permanently burned into fuses in the i.MX6 CPU, and the boot ROM routines will validate the signature attached to the U-Boot boot image before executing it. U-Boot then validates the signature of the app and updater partitions before executing any code from them. The updater partition is a fall back Linux installation which is used when new firmware images are made available by the manufacturer. To tell U-Boot whether to boot the app or updater partitions, it checks for a file called DO_UPDATE in the database partition:
Loading file 'DO_UPDATE' to addr 0x83000000 with size 1 (0x00000001)...
Done
Total of 1 word(s) were the same
Based on (my recollection of) previous analysis of the Hub 1, if there is a 1 in that file, it will start the update process, otherwise it will run the primary app partition. It’s not really important at this stage, as we have no real way to influence this!
The last thing that is worth noting about the boot log in this initial analysis is that there is no shell or login prompt at the end of it. So, no way to interact with the Hub via the UART. Fortunately, we can still get some output indicating what is going on internally, so we’ll keep the UART attached.
At this point, the Hub is booted, and with no Ethernet cable connected or WiFi credentials configured, it has started its own WiFi AP to allow the user to set it up.
We configured our router to block any internet traffic from the Hub, then connected the Hub with an Ethernet cable. A quick nmap scan later, and we get the following:
Not shown: 65531 closed tcp ports (reset)
PORT     STATE SERVICE                 REASON         VERSION
80/tcp   open  http                    syn-ack ttl 64
1883/tcp open  mosquitto version 1.4.8 syn-ack ttl 64
8886/tcp open  unknown                 syn-ack ttl 64
8888/tcp open  ssl/sun-answerbook?     syn-ack ttl 64
Full nmap scan output can be found here, including service fingerprints.
Port 80, 8886 and 8888 are HTTP servers (8888 over SSL using a self-signed certificate). They don’t seem to have any user-facing applications on them, rather being intended to allow external mobile applications to interact with them.
# curl -i http://192.168.254.226/
HTTP/1.1 200 OK
content-type: application/json
content-length: 255
Date: Tue, 30 May 2023 07:01:05 GMT
Connection: keep-alive

{"winkState":"NOC-NotConnected","networkState":"CON-Internet","lastNetFailure":null,"lastWinkFailure":null,"acceptingWifiConfig":true,"acceptingCreds":true,"haveEthConn":true,"haveWifiCreds":false,"bundleId":"None","fwVer":"4.4.1-0-g5167f88bfd-hub2-app"}
# curl -i http://192.168.254.226:8886/
HTTP/1.1 200 OK
content-length: 20
Date: Thu, 01 Jan 1970 01:41:14 GMT
Connection: keep-alive
AAU Heartbeat Server# curl -i -k https://192.168.254.226:8888/
HTTP/1.1 200 OK
content-length: 824
Date: Thu, 01 Jan 1970 01:40:36 GMT
Connection: keep-alive
<?xml version="1.0"?>
<root xmlns="urn:schemas-wink-com:device-1-0">
<specVersion>
<major>1</major>
<minor>0</minor>
</specVersion>
<URLBase>https://192.168.254.226:8888</URLBase>
<device>
<deviceType>urn:wink-com:device:hub2:2</deviceType>
<friendlyName>Wink Hub 2</friendlyName>
<manufacturer>Wink, Inc.</manufacturer>
<manufacturerURL>http://www.wink.com</manufacturerURL>
<modelDescription>Wink Hub 2</modelDescription>
<modelName>Wink Hub 2</modelName>
<modelNumber/>
<modelURL>http://www.wink.com</modelURL>
<serialNumber/>
<UDN>uuid:b540dc21-da92-4b84-b70b-2d2e1ae7fb13</UDN>
<UPC/>
<iconList/>
<presentationURL/>
<serviceList>
<service>
<serviceType>urn:wink-com:service:fasterLights:2</serviceType>
<serviceId>urn:wink-com:serviceId:fasterLights</serviceId>
<controlURL/>
</service>
</serviceList>
</device>
</root>Port 1883 is cleartext MQTT, and it is possible to connect without any authentication, and subscribe to the root topic:
mosquitto_sub -h 192.168.1.226 -t '#'Unfortunately, since the Hub was not configured, and had no devices linked to it, there was no traffic observed. It’s possible that there may be some application on the Hub that is listening to a particular topic, and might pass data received to a command line program. If we could get the firmware off, it would be worth investigating!
We wanted to check that the known glitch attack had been properly addressed, so we pried the top of the metal shield off the CPU (and RAM and flash). We tried shorting one of the data pins to ground while U-Boot was loading and verifying the app partition. As expected, the signature verification failed, and it fell back to booting from the updater partition. Here is the relevant boot log output.
When the system was booted from the updater partition, nmap showed the same services open, apart from the MQTT service on port 1883.
Not shown: 65532 closed ports
Reason: 65532 resets
PORT     STATE SERVICE        REASON
80/tcp   open  http           syn-ack ttl 64
8886/tcp open  unknown        syn-ack ttl 64
8888/tcp open  sun-answerbook syn-ack ttl 64
MAC Address: 00:21:CC:4B:F1:1D (Flextronics International)
Continuing to hold the data pin to ground while the updater partition was verified (so no messing with that one either!) resulted in the Hub simply ending up resetting and starting again. Detailed logs available here.
The next attack we wanted to try was to intercept traffic from the Hub to the Internet. We could see it doing DNS lookups for hub-updates.winkapp.com, so we configured our DNS server to return a local address, and ran an SSL listener on port 443. Unfortunately, as soon as it connected and negotiated an SSL connection, it disconnected, printing an error message to the UART console.
curl: (90) SSL: public key does not match pinned public key!
date: invalid date 'Error:-bad-date format'
Looking up that error message, it turns out that curl has an option to check the certificate against the hash of the certificate:
--pinnedpubkey <hashes>
       (TLS) Tells curl to use the specified public key file (or hashes) to
       verify the peer. This can be a path to a file which contains a single
       public key in PEM or DER format, or any number of base64 encoded
       sha256 hashes preceded by 'sha256//' and separated by ';'.

       When negotiating a TLS or SSL connection, the server sends a
       certificate indicating its identity. A public key is extracted from
       this certificate and if it does not exactly match the public key
       provided to this option, curl will abort the connection before
       sending or receiving any data.
Since it is verifying using a hash of the public key, there is no opportunity to try fake the certificate by cloning it with Apostille. It’s also worth noting the error message following – the Hub appears to be trying to set the date and time by connecting to their server, even though the NTP service is also running. (This is the same behaviour as the Wink Hub 1.)
Since we were making no forward progress, Michael decided to solder a JTAG header onto the board, and see what could be seen. After a couple of false starts with flaky cables that halted the CPU (even when nothing else was connected to it!) we managed to connect Michael’s Tigard and try to connect using OpenOCD. Unfortunately, as soon as OpenOCD started talking to the CPU, it simply halted, and refused to proceed.
Next, we attempted to delve into Colin O’Flynn’s magical world of glitching with the PicoEMP. The idea behind this is to introduce interference inside the chip through the use of high-voltage electro-magnetic pulses. Due to the physical nature of the attack, results will vary widely depending on the execution state of the processor as well as where and how close you aim. It’s … not an exact science (as a handheld device). A few attempts in every position allowed by the shield, produced no results. Eventually, we realised that in a certain position, the CPU would halt execution. Our excitement was short-lived as we quickly realised that the “glitch” was introduced before even triggering the PicoEMP and that the fault was in fact coming from shorting out contacts on the board with the ferrite core of the PicoEMP.
We also noted that there was a footprint for a Micro-USB connector on the board, which appears to be this one. Since we didn’t have any on hand, Michael decided to solder directly to the (extremely fine pitch) pads, using magnet wire, and then connecting that to a donor USB cable. After a few false starts when the magnet wire decided not to stick, I was able to plug the USB cable into a sacrificial USB host (in case the pinouts were wrong), and look to see if there was any attempt to enumerate. Interestingly, the power supplied by the USB port was enough to power up the Hub, as seen by messages on the UART. Unfortunately, there was no sign of any enumeration.
Thinking that it might be that the CPU would fall back to USB if it was unable to communicate with the flash chip, we tried pulling the CE# (Chip Enable) and RE# (Read Enable) pins low, first via 470Ohm resistor, but eventually via a direct wire. It was only when using the wire that we noticed any effect – basically it failed to even start. It is likely that we will need to alter a strapping resistor to tell it to try and boot from USB – actually finding that will be a fun exercise with no schematic or board level diagram! There was no switch on board to do it for us, unfortunately! (Although in retrospect, there is a button labeled SW3 that we didn’t explore!). After the fact, I realised that there are two test points adjacent to the USB connector footprint, and these are connected to the D- and D+ USB signals. No need for the super fine soldering work! One might even be able to make a pogo-pin adapter, taking Vcc and Ground connections from elsewhere on the board!
At this point, we started wrapping up our investigation as we were running out of time. Ideas for future exploration include:
- Investigating how the Android Wink Application locates and provisions the Wink Hub, setting WiFi credentials, etc.
- Allowing the first curl connection to succeed, and let the Hub get the time. Keeping track of how many bytes are downloaded is probably a good idea, and terminating the connection if it looks like it is downloading a new partition image would probably be wise. Then intercepting future requests after that, until we see some interesting network behaviour. Hopefully!
- Buying another Hub 2, and using hot air to remove the flash chip, and take an image of it. Then, reviewing the various partitions for any possible vulnerabilities that could result in code execution. The exploit itself would need to be stored on the unverified database or database backup partitions, of course, otherwise the partition signature checks will fail.
- Trying to find the strapping resistor to get the Hub to boot from USB. This might be a dead end due to the High Assurance Boot, but NCC Group did find a vulnerability in the i.MX6 CPU that might be relevant.
